Showing posts with label vintage. Show all posts
Showing posts with label vintage. Show all posts
Tuesday, November 10, 2015

Thursday, August 6, 2015
Challenge Project and Free Word SVG File

Hi Everyone! I have to say I'm extremely excited! I do all kinds of crafts and fine art work. But (you had to hear that coming,) I absolutely cannot create a card. I'm horrible! Yes I struggle! There is no explanation, except maybe, a brain block. Today for only the second time, I've done it. Made a card I actually like!
Thanks to the Crafty Secrets Blog Challenge! Their products and a blog hop helped inspire me to do two things. Create a card and enter a challenge for only the second time! So here goes!

I've made this card from products from Crafty Secrets and
my little Hello SVG, and added some techniques I love.
You may pickup your free SVG HERE.
I really had fun making this. I wanted a "Hummel" type look to the card and began by decoupaging the "Telephone Girl" included in the set "Couple of Cuties Digital Art Stamps" from Crafty Secrets.
I printed her out five times and began by fussy cutting and gluing the pieces together. Using Distress Ink, vintage photo, along the outer edge of each layer so there were no white edges showing. The vintage photo is really one of my go to products for this technique.
I colored the showing top layers with my "Kuretake Clean Color Real Brush Pens" The colors are really bright. To get that aged faded look, I used the Krylon, Crystal Clear Matte Spray and it helped to wipe out and blend out colors in layers. I also used them to create a thick distressed look whitewater around the image and on the layer holding the girl.

I then printed out the digital paper "Blue Quatrefoil" from the "Birds in Bloom Kit". This is also from Crafty Secrets. This paper and the girl were offered as a freebies to anyone who wanted to participate in the challenge. I have purchased from Crafty Secrets before and the quality is amazing!
I then cut black and white cardstock to card sizes and began to assemble the card. "Guipure Black Lace" from Wild Orchid Crafts was placed along the back of the white cardstock along edge. Because this left a raw edge on the back of the card, I cut a black piece of cardstock to cover the back. I also place black and quatrefoil print inside the card to draw it all together. This made the card sturdier.
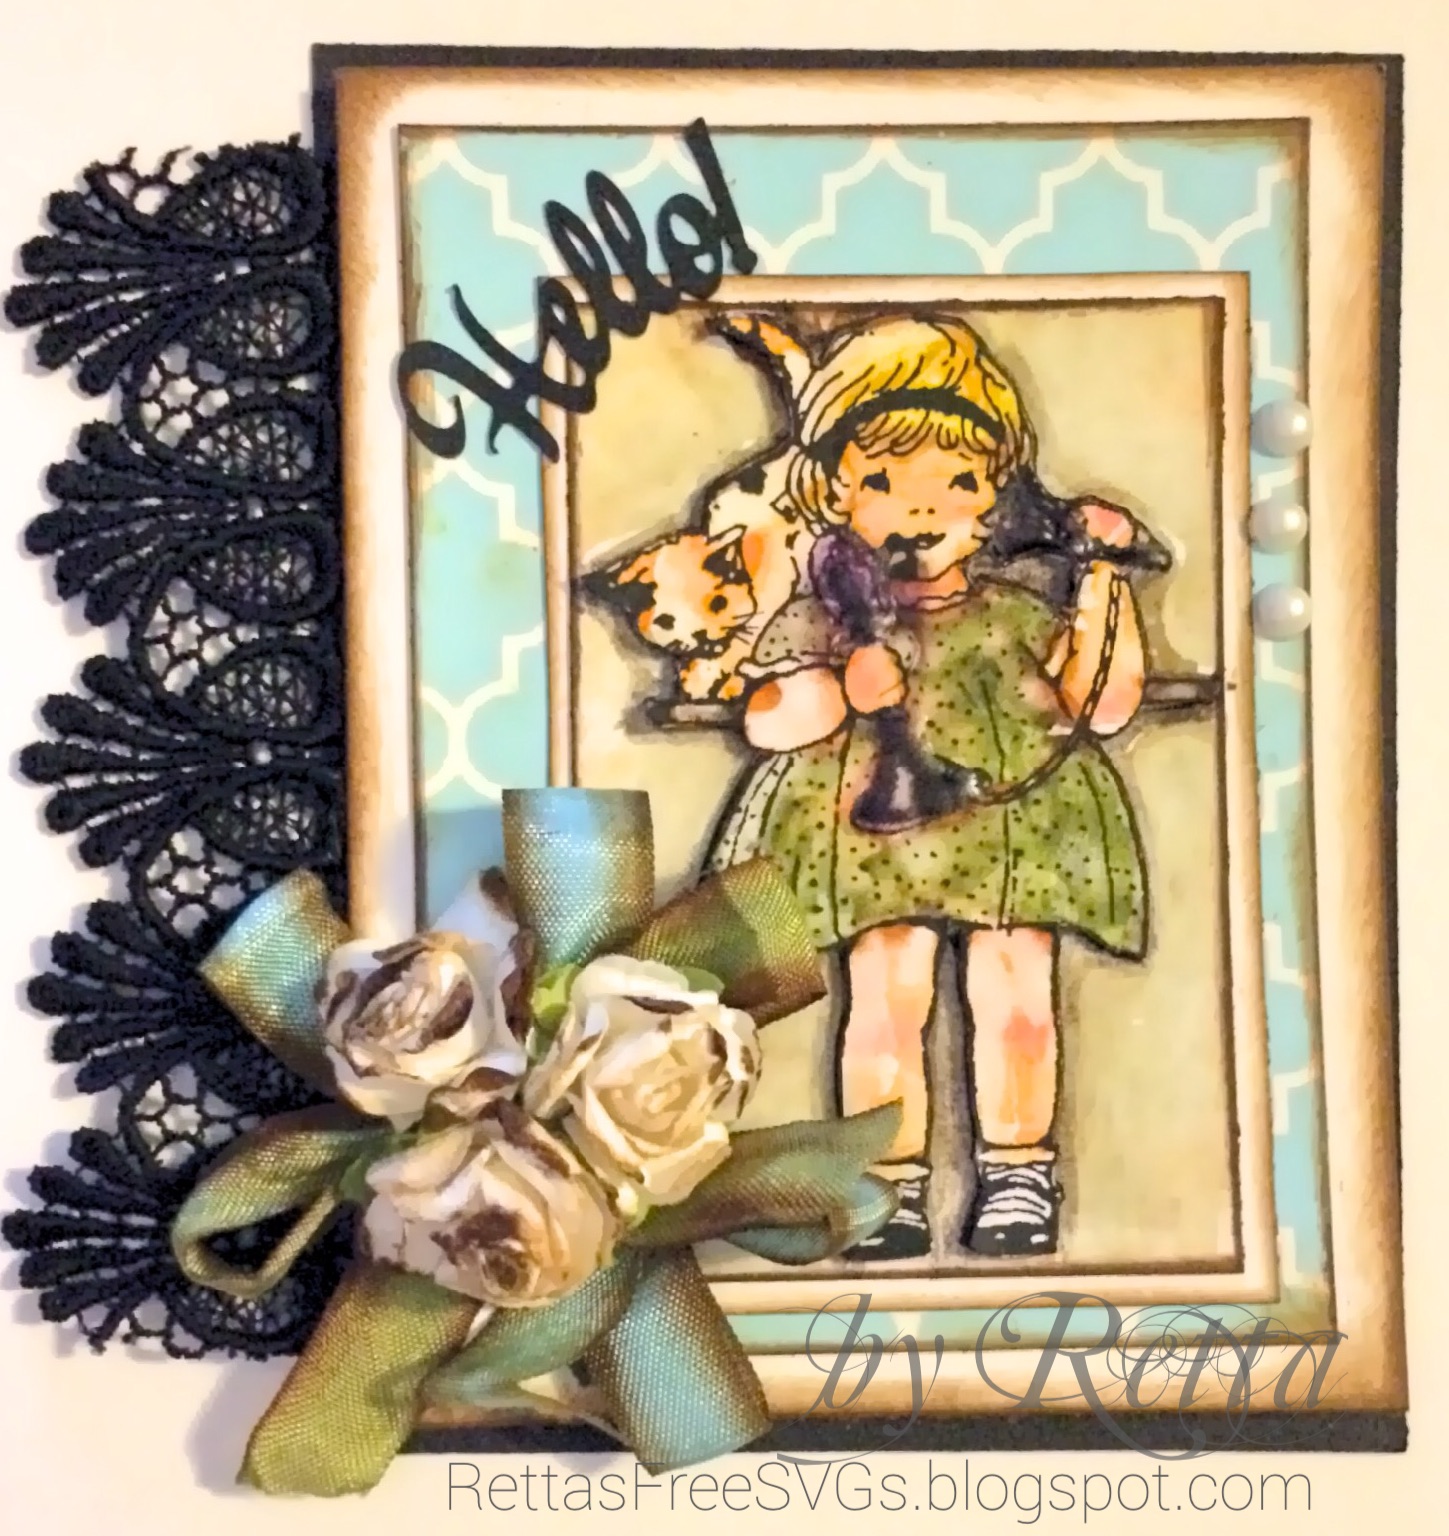
I then added seam binding in moss green and aqua after distressing both with the vintage photo. The two-tone white with beige blush wild rose in 3Omm were also distressed and added on the seam binding bows . Wild Orchid Crafts had both products I purchased.

As a final touch I added Pebbles Creme Self-Adhesive Candy Bits from my stash. After spraying with matte spray again, there was this wonderful satin finish on the girl and the pearls.
Other than the free digitals from Crafty Secrets, I'm not affiliated to any company and the oppinions are just mine.
Please checkout Crafty Secrets Blog Hop and get inspired too! Thanks for stopping by!

Wednesday, June 10, 2015
Vintage Banner Freebie
Hi everyone, It was a beautiful day today! It was sunny and warm. Tonight I hear thunder. I'm just glad I'm inside. Those Boomers have been almost nightly and pretty strong. Where ever you are, I hope it is lovely for you! Speaking of lovely . . .
My best friend's daughter got married last year. I was asked to design a banner that was off white color, with a vintage look to it for the shower. She wanted everything white or off white. They decorated with old suitcases and even made white foods. The suitcase had a small banner that said cards, the food table was labeled and had a banner above it hung with tulle.
This SVG will import all pieces. I would then group the decorative pieces into one layer and the banner on it's own layer. I would print the decorative part on any color paper using your registration marks. I then cut the Banner shape and I'm ready to hang or label as desired. Don't forget to include any letters to make-up your message. I did also ink my paper around the edges to give it that aged look.

I hope you enjoy these and would love to see how you use them.
Thank-you for stopping by and please share with your friends..

Subscribe to:
Posts (Atom)